Sunday, May 8, 2016

Sweet Child's Chair

I found this sweet little chair at a local thrift store/salvage yard.  It was outside with more weather-proof industrial salvage, so I decided to rescue it from our rainy Pacific Northwest weather and bring it home!

It's a sturdy little chair, but the wood was pretty rough and worn.  Someone had made the webbing seat with care but now the velvet and corduroy fabrics were dirty and faded.


I decided on freshening up this sweet little chair with a coat of white paint and mattress ticking fabric to integrate it into the other items in my stash.  I also added a removable pillow to make a soft backrest for the little backs I hope will soon enjoy it!


After removing the old seat and giving the chair a light sanding and wipe down, I brushed on two light coats of a flat white paint, then sanded the paint down to the raw wood.  It is sealed with polycrylic.  


For the seat, I sewed 2 inch wide strips of cotton mattress ticking and wove them across.  They are simply stapled on the underside of the chair.  The pillow has sweet little trim and ties.


I had so much fun styling this chair with a teddy and boho-inspired bunting.  Its ready for some teddy bear tea parties!


Monday, May 2, 2016

My Nod to Boho Chic

I've always been drawn to the bohemian chic look, both in decor and fashion.  In fact, the wedding dress that I just can't get over is boho chic...but, at the end of the day, it just isn't me (and I do want to resemble myself on our wedding day!) or my design sensibility in general.  Buuuuuut, that doesn't mean that I wouldn't love to have some items of that style in my booth at The Blend.

So you can imagine my excitement when I spotted this vintage rattan peacock chair at a local thrift store - like careening across a four lane road to make the turn kind of excitement #safetyfirst.  The rattan is in great condition.  All this chair needed was a good cleaning and a colorful pillow.

I adore this pillow.  I say again, I ADORE this pillow.  I pieced a striped fabric together to make the square design and used couple different crocheted trims to make the trim and tassels. 


Those little rustic wood boxes will be available in my booth as well.  They a make perfect caddy for crayons or silverware.

Campaign Desk Revived

I call this furniture makeover a revival because this campaign desk went from dark and dingy to bright and lively.  I found this desk by Lane Furniture at our town's annual "world's largest garage sale."  I got it for a steal, especially given how popular campaign furniture is right now, because it weights a ton and the seller didn't want to cart it back home! The seller was a real estate agent and he used it for staging homes.  Over the years the finished got dinged, scratched, and stained from all the moving it in and out of homes, but the hardware and drawers stayed in perfect condition because it didn't receive day to day wear and tear.

The drawer fronts were in great condition, but the veneer on the top was a mess with some gouges in it and the veneer on the desktop and sawhorse legs didn't match.  So, this desk was the perfect candidate for a blended paint and stained wood treatment.

I removed all the hardware and spray painted it a soft brass.  I had hoped to polish the hardware but I realized that wasn't going to resort in the luster I wanted.

The desk body and legs got a rough sanding to prep for paint, and the deepest scratches filled, while the drawer fronts got a careful sanding to remove the current finish.  The top has vertical bands of the same wood veneer on the drawer fronts so I opted to paint around them to add in some contrast on the desktop.  

I primed the desk and legs and painted it in a custom color. Its a slate-y blue with gray undertones.  Its all sealed with polycrylic.  The drawer fronts' original stain color was grayish and drab so I used Minwax Red Oak to give them a warm, honeyish tone.  They are finished with a wipe-on polyurethane.  

I love how the cool blue paint and warm wood tones compliment each other.  I think my favorite feature is how the hardware now pops.

Actually, nope, my favorite feature are the new drawer liners - maps from Hertfordshire, England!

This campaign desk will be one my featured items at The Blend in August.

Thursday, April 28, 2016

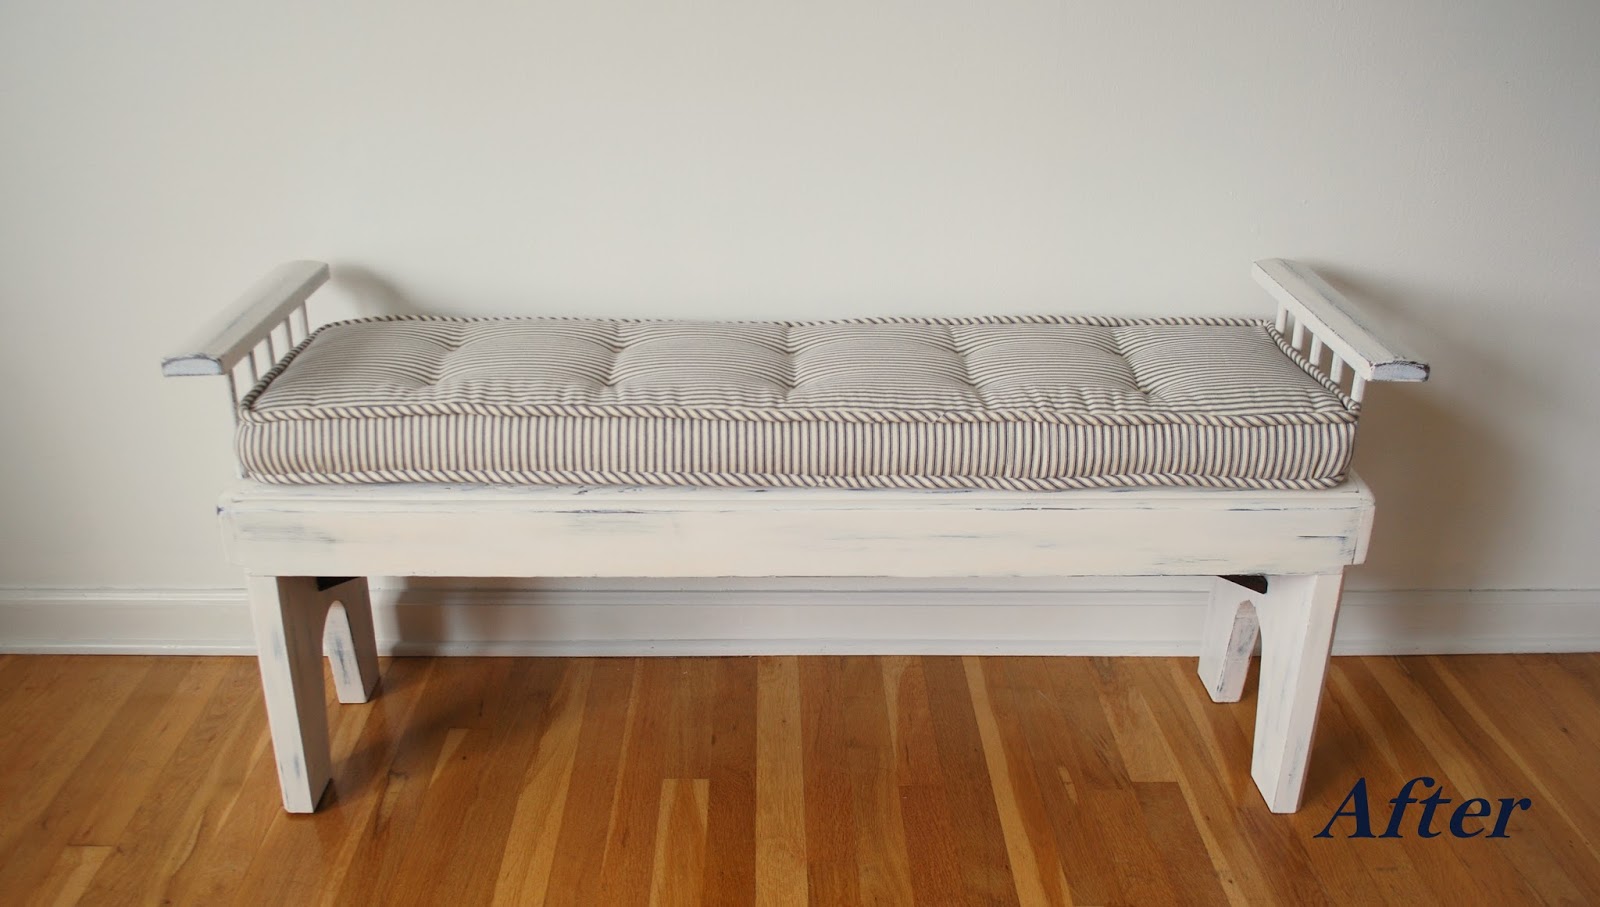
Brightening Up a Drab Bench

This was one of those projects that I doubted until its completion.  I could envision the final product but at every stage along the way, I just though "I don't know about this."  But, I'm glad I kept going because I LOVE it now!

This bench is really well made, using dowel joinery instead of nails or screws.  It also weighs a ton.  But, the wood types and grains were mismatched in a rather unpleasant way and it had a high gloss finish.  It was the perfect candidate for paint.


After a good sanding and cleaning, the bench got a quick coat of a custom Behr color, a slate-y blue with gray undertones.  Then, two coats of Behr's Smokey Cream.  This is one of my favorite neutrals and is currently the color of my dining room.  On the bench, with the blue peeking through, it reads bright white, but in my dining room has a pinkish gray hue during parts of the day.


A light distressing lets the blue and wood tones pop through.


The box cushion in cotton ticking makes this a comfy place to rest.  I picture it in a hallway or entry as a perfect spot to take off your shoes after a long day.


I staged the bench with a piece of macrame driftwood.  I love the look of the soft string weaving with with hard driftwood.  I still have to come up with a purpose of it, but for now I enjoy looking at it! These pieces are destined for The Blend eclectic furniture and decor festival in Corvallis, Oregon in August.


Friday, April 22, 2016

Vintage School Chairs

Who doesn't love a good vintage schoolhouse chair!  When I got them, the metal frame was its standard tan and the plywood seats and back were two different tones.


After what felt like hours sanding off the old finish from the wood, I restained them in a warm red oak.  They still don't quite match but they are close.  

For the metal frames, I painted one coat of a light green paint, then a coat of blue, then sanded the blue away to expose the green paint, the original tan paint, and even the bare metal under it all.  It's all finished with a coat of polycrylic.  These chairs are for The Blend, a furniture and home decor show in Corvallis, August 19 & 20.


Friday, April 15, 2016

The Chippy Chair

I've been wanting to try my hand at creating a chipped, distressed paint treatment and decided that this sweet and sturdy wood chair would be the perfect candidate.
Structurally, the chair was in great condition but any finish had long since worn away and the wood was stained and blotchy.

To get this chippy finish, I layered paint over wax then distressed it with a heat gun.  I did a small section at a time.

How to:
With a cloth, wipe on an all natural furniture wax.  It should not be uniform or even, but there shouldn't be thick chunks of wax either.

Immediately apply the paint.  I used Behr Premium Plus paint + primer.

Using the heat gun, set to low and keeping it well back from the surface, dry the paint.  You can also let it air dry but using the heat gun saved time.

Once dry, switch the heat gun to high and hold it near the surface to bubble the paint.  Do this more in areas that would receive the most wear, and less in others.

Let the paint cool, then gently scrape the section with a putty knife to make the raised paint chip off.  The wax will resist the paint and let it come cleanly off the wood.

Clean all the paint chips off and seal with polycrylic.

**When using a heat gun on paint, be sure to work in a well ventilated area and wear heavy gloves and a mask.

I love that this chair looks like it has been sitting in a barn with a well worn patina, but instead of a lead paint risk, it was done with beeswax, non-VOC paint, and is sealed with a water based sealer.


Friday, March 4, 2016

Cleaning Thrift Store Art

I found this painting buried in a second hand shop.  The painting is in great shape for being 41 years old but was very dirty.  Dust, cobwebs, and mud splatters were on the frame and canvas. I'm not sure if the paint is oil or acrylic but it is on a stretched canvas. I love the colors and that it was painted by a local woman.  It just feels very much like our new home here in Oregon.

Before getting into this, I need to say that I would never do any of these techniques to a piece of artwork that I believed to be valuable or was truly dear to me.


Doesn't look to bad huh?!  But here is a close up of the canvas:
Mud splatters and a dirty frame.

A Google search turned up a suggestion to rub the painting with a slice of bread then brush the crumbs away.  Let me tell you - it worked like a charm!  The dirt splatters lifted right up without having to use a damp cloth or other cleaning agent.
Dirty bread - can I get a collective yuck!
Mud splatters be gone!
Next, I wanted to address the wood frame which was also stained and filthy.  It was lightly painted with a metallic paint.  Nothing too garish but I wanted to warm up the tone.

I taped the edge of the canvas off from the frame, after testing in a corner whether the tape would lift the paint.  I lightly sanded the frame and dirt that came up was so gross!  I applied a coat of black walnut tinted danish oil.  After wiping the oil away, the change isn't dramatic but it nourishes the dried out wood and warmed up its tone.

I'm so pleased with how the painting cleaned up and now looks in our house.  Most importantly, I love having a piece of art that celebrates our new home by a local artist.