Sunday, March 31, 2013

Crystal Dessert Stand


The internet is full of instructions for making dessert stands . . . . . and here’s another one!

My three tiered dessert stand is made from plates from the thrift store, an ice cream sundae dish, and glass candle sticks from the dollar store.  They are bonded together with a clear epoxy.  Be sure to use an epoxy that does not include silicon, which will keep it from hardening.


  • Clean and dry the glassware.
  • Mix the epoxy according to the package instructions.
  • Spread epoxy on the bottom of the sundae dish and center on the bottom of the large plate.
  • Epoxy the tops of each candlestick and center on the bottom of the medium and small dishes.
  • Allow the epoxy to set.  You now have 3 single tiered stands, small, medium, and large.


  • Spread epoxy on the bottom of the candlestick of the medium set and center on the top of the large plate.
  • Epoxy the bottom of the candlestick of the small set and center on the top of the medium plate.
  • Allow to set.
I used the sundae dish upside down to make a wider base.  I love how the plates are all different as well!  The glassware cost about $10 and the epoxy $5.

 
We set the stand up for Easter breakfast.  The scones are a Cook’s Illustrated recipe, which makes the best scones I’ve ever had.   


The punch is one bottle of Naked Berry Veggie smoothie, 3 cups of orange juice, and one 33 oz bottle of lime seltzer.  I think it would be great with a sparkling rosé for an adult version too.


Saturday, March 30, 2013

From Maps to Plants, Repurposing and Reviving an Old Map Stand

I work in a small, shared office at a university.  We recently reorganized and re-envisioned our office space that including paring back and purging what we didn't need.  It was a great and invigorating spring clean!

Ever since I've started working there, an old metal map stand has stood in the corner but didn't serve a purpose in our office, so I brought it home, gave it a good cleaning, and came up with the idea to turn it into a plant stand.  The slats for rolled up maps were perfect supports for shelves.

Dusty and drab!

It was very dusty and tarnished, so the first step was just cleaning it!

Then, I used this technique over at one of my favorite blogs, Centsational Girl.  I scrubbed the stand with lemon juice and salt.  This polished off some of the tarnish but not too much.  I'm not sure if it is brass or bronze, but I am loving the warm golden glow that shows through.

Using wood I had left over in my basement, I cut out the two shelves. I wanted them to look like aged, reclaimed wood.  I pounded the edges and corners of the shelves with a hammer, dragged the hammer over the flat surface of the wood, and banged some other metal tools into the wood, leaving dents and gouges.  I even scraped the wood against our rough concrete driveway.  I sanded the shelves until smooth, then wiped it free of dust.

Loving the bands and knots in the wood.
Dented edges (sounds like an '80s rock band).
Continuing with the reclaimed look, I decided to oil the wood with black walnut tinted Danish oil, and finish it with an orange beeswax.  This combo gives the wood a nice patina that doesn't look too "finished."  I love the different bands of colors and the knots. 


I am always surprised at how much the dents and nicks show once a stain or oil is applied.  My advice is to be a bit conservative in the amount you do and scrub the stain or oil into those imperfections to bring them out.

Voila!
I love the wood and metal combo!

I love the end result and the shape of the metal stand.  I am now able to display some of the white stones we brought back from the Greek islands a few years back.  Wrapped with copper wire, they are an interesting way to display photos and postcards. 

Loving how the white stones pop against my dark "reclaimed" shelf!
I was having a lot of fun with the stones and wire and made this little sculpture of a stack of small stones as well! 
Oh, and the postcard there, of the Fog City Diner in San Francisco?  It is of a painting by my mom.  Check out her amazing pastel paintings here!

The total cost of this project was $0, yup $0!  And it gave new life to an interesting, but not functional, antique.

Saturday, March 23, 2013

Recipe: Tipsy Onions

One of our favorite things to do in the Bay Area is go up to wine country.  Over the years though, we've stopped doing tastings at several wineries a day and instead go for a hike at the Jack London State Park (the site of his farm), the Sonoma Reservoir, or any of the other great hiking spots nestled amongst the vineyards.  Then, we go to one or two wineries, pick out a great bottle of red (pinot noir, zinfandel, and petit syrah are our favorites in this region), and have a picnic at the winery.  Many wineries have outdoor picnic areas and will waive the tasting fee and provide glasses for your picnic when you buy a bottle!

This weekend, I decided to do a slightly different take on our standard bread, cheese, and salami picnic, and created this onion dish with which to top the bread.  I'm not really sure what to categorize it as: onion conserve? onion jam?  Whatever it is, it is tasty!


Tipsy Onions
2 medium red onions
1 cup white wine
1 tsp dried thyme
2 tsp olive oil
1-2 tbsp bourbon (optional)
Kosher salt


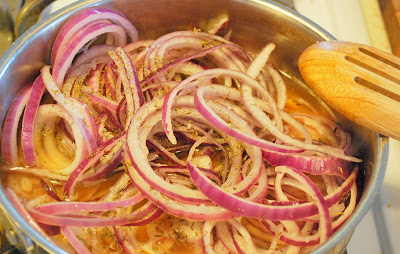
Thinly slice the onions into rings, while the olive oil is heating in a pan over medium heat. 

When the oil is heated add the onions and stir for about 1 minute.  Add the wine, bourbon (if using), thyme, and a pinch of salt.
Simmer, uncovered, over medium low heat.  Stir occasionally until the onions are softened and the liquid begins to evaporate.  Increase the heat to medium.  Let the liquid evaporate fully and stir so that the onions begin to lightly brown, but not burn or stick. 
 
Rosé Vinegar Dressing
3 tbsp rosé vinegar
Scant 1 ½ tsp honey
¾ tsp Dijon mustard
8 tbsp olive oil
Pinch of salt and pepper

Do you have a mini-food processor?  I love mine, especially for making dressings in small quantities.  It emulsifies the oil in a just a few seconds resulting in a creamy dressing.  These steps are the same if you hand mix the dressing, it just takes a bit longer.


In the food processor, mix the vinegar, honey, mustard, salt and pepper.  Pulse a few times.  Add the olive oil and give it a few pulses until the dressing is creamy.

If mixing by hand with a whisk, add the oil slowly bit by bit.

To serve: top bread slices with arugula and a spoonful of the onions.  Drizzle with the dressing and top with a shaving of Pecorino Romano.  And don't forget to pour the wine!


Wine and lots of great goodies!
We ended up at the Hartford Winery and had a great bottle of their Russian River Zinfandel.  We also had a goat cheese brie, salami, apples, dried fruit, and nuts.

How do you know it has been a successful picnic?  I think these two photos say it all!

The aftermath!
 

Monday, March 18, 2013

The RAST Dresser

My nephew is staying with us a couple nights a week and we wanted him to have a place for pajamas and his things.

Enter the RAST, the favorite amongst crafters for being a blank canvas for all sorts of design treatments.

The RAST in its original state.
After assembling the dresser, which went quickly and smoothly, we gave it a light, quick sanding with fine grit sandpaper.  We then gave its exterior surfaces a coat of Zinnser primer to lay the foundation for the paint.  I like to use a spray primer because it goes on evenly and there isn't any clean up with mineral spirits.  I did two coats of primer, with a light sanding in between.


I painted the dresser a very pale blue and painted the knobs in brushed nickel metallic spray paint.  When painting knobs and pulls, I like to poke the screws through a piece of cardboard and attach the knobs.  This way, the knobs stay straight up while painting.

I also made a stencil of a elongated star burst, just using clip art on the computer.  I carefully taped all the edges of the stencil and spray painted it with the metallic paint.  I plan on putting on a protective finish, but just haven't decided what yet.  The color is a custom Benjamin Moore that I added more blue to so I don't really know the color!  It also has Floetrol added to it to help even out brush strokes.

Finished dresser - I love the little red converse!